Pinnacle Mountain: Creating 3D Models from Topographical Data
Introduction
I’ve always had an interest in geography, so I thought it’d be fun to generate a 3D model of a geographic feature. Pinnacle Mountain is a prominent peak in central Arkansas that rises just over 1000 feet in elevation. While not actually volcanic in nature, it closely resembles a dormant cinder cone.
Using USGS’s National Map Downloader provided the raw elevation data for this project, which was then refined in QGIS with Javier Venceslá’s DEMto3D plugin.
Getting Elevation Data
The USGS publishes elevation data of various levels of precision across the US. Most areas have maps that are accurate to 1/3 arc-seconds (approximately 10 m), but I was even able to find a map that is accurate to 1 meter for this specific area. The elevation files we’re looking for are called TIFF files (either a .tif or .tiff file format).
The USGS site has 2 options for selecting and downloading elevation data: topoBuilder and the National Map Downloader. The topoBuilder tool is a bit easier to use but the National Map Downloader provides more custom controls and often has higher resolution maps available, so we’ll use that.
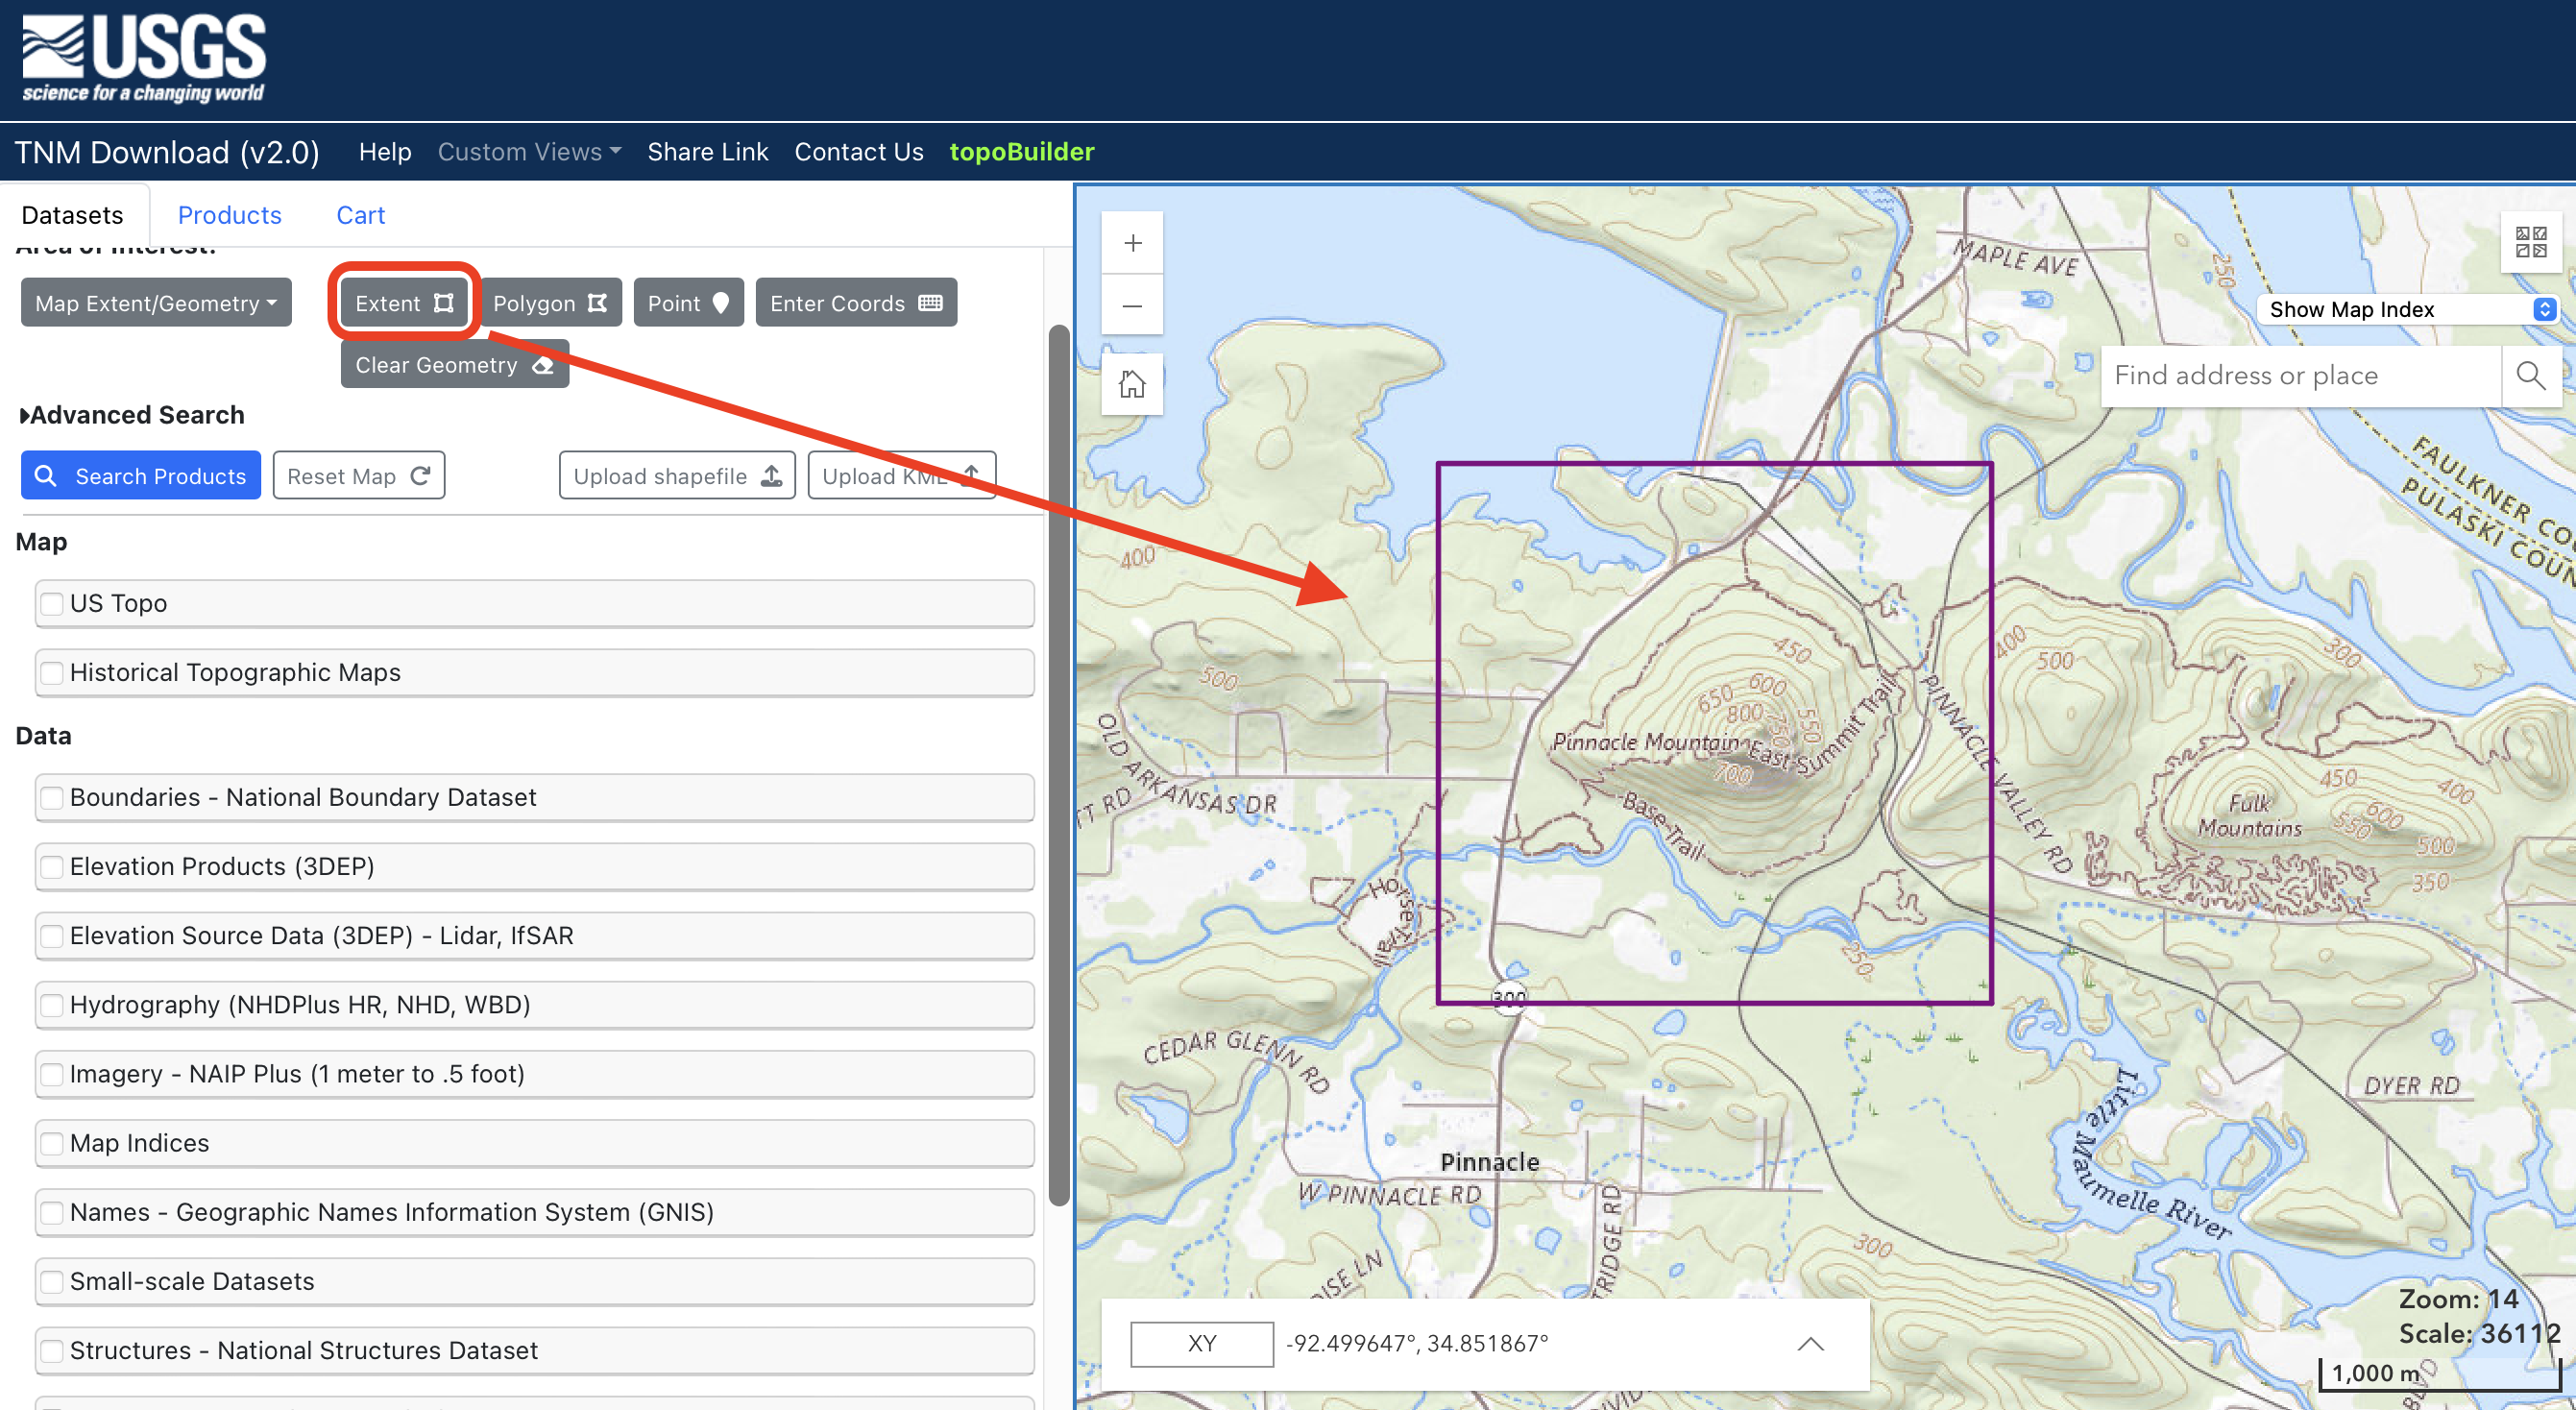
Draw a bounding box around the area of interest
Start by zooming into the area of interset and drawing an “Extent” boundnig box around the feature, in this case Pinnacle Mountain.

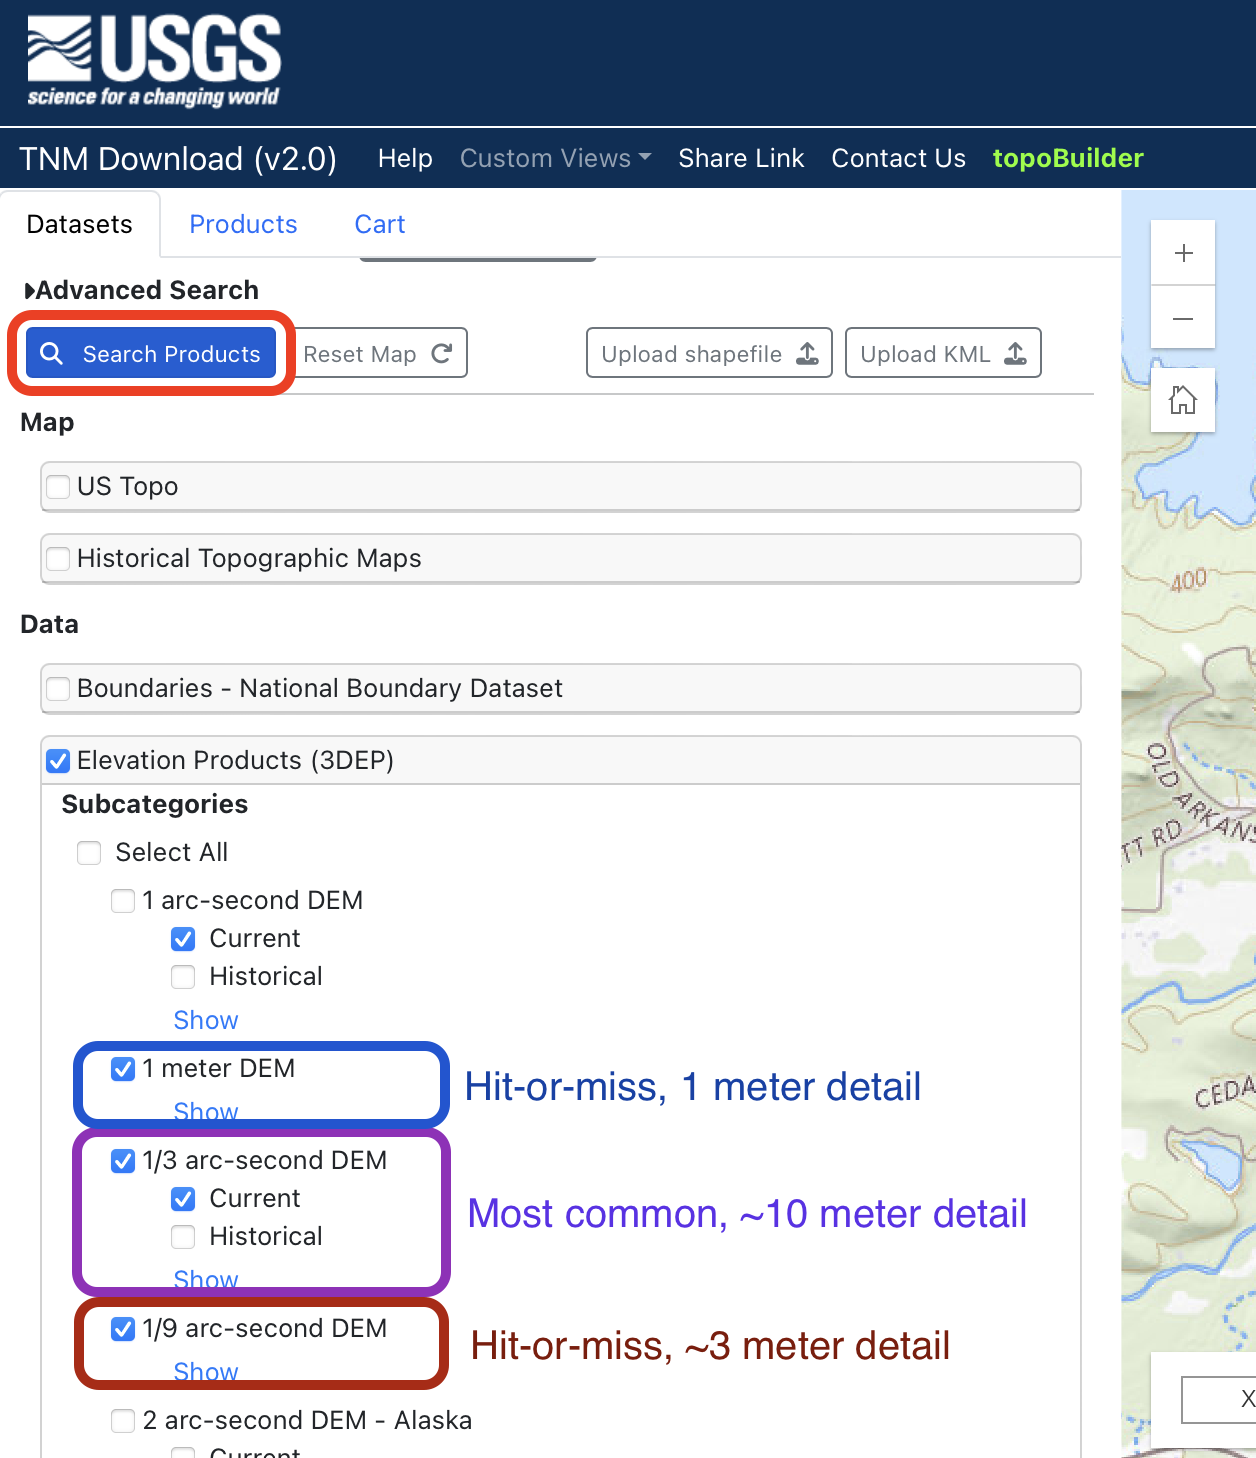
Select the elevation products and search
Next, we filter our results to the Elevation Products (3DEP) category. Within this category I selected 1 meter, 1/9 arc-second, and 1/3 arc-second. If 1 meter is available, this is generally the most detailed that can be found publicly available. If not, the 1/3 arc-second is still accurate to about 10 meters and is very highly available across the continental US.
Once you find a dataset, click the download link for the .tif file. Note, I was only able to get it to download using google chrome. Also, this tool has at times been hit-or-miss in correctly showing all the available datasets. Worst-case scenario the datasets can be found in list form here.

Refining and Exporting to STL
Importin into QGIS
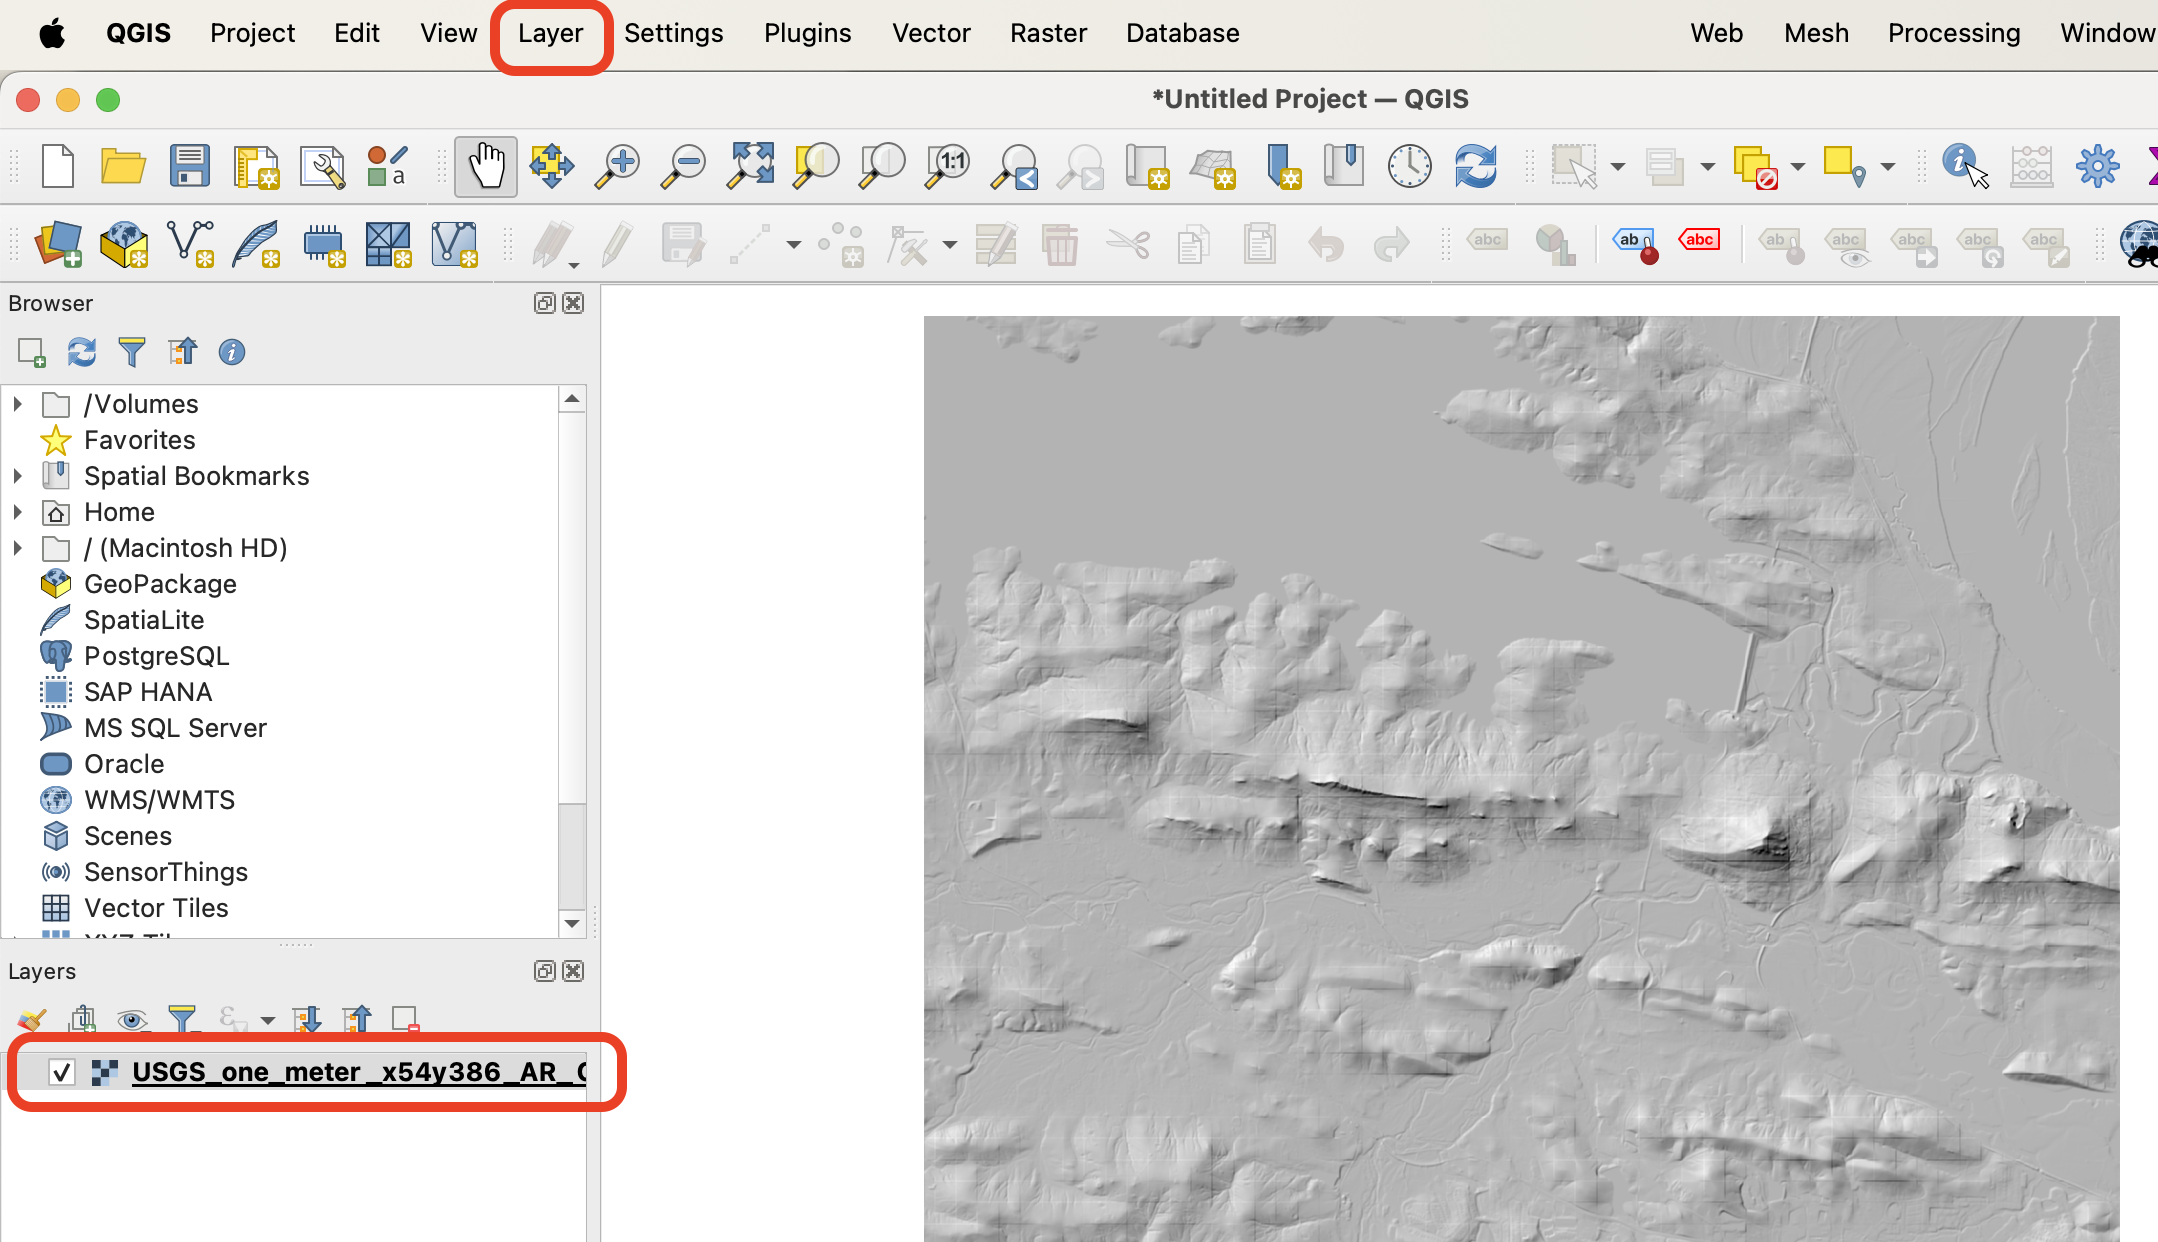
Once we have the .tif file, we need to focus just on the feature we want. Opening a new project in QGIS and importing the .tif by going to Layer->Add Layer->Add Raster Layer allows us to see the entire model. You may notice that the whole rectangle looks gray, this can be resolved by double clickng on the layer in the bottom left of QGIS and changing the render type to Hillshade.

DEMto3D Plugin
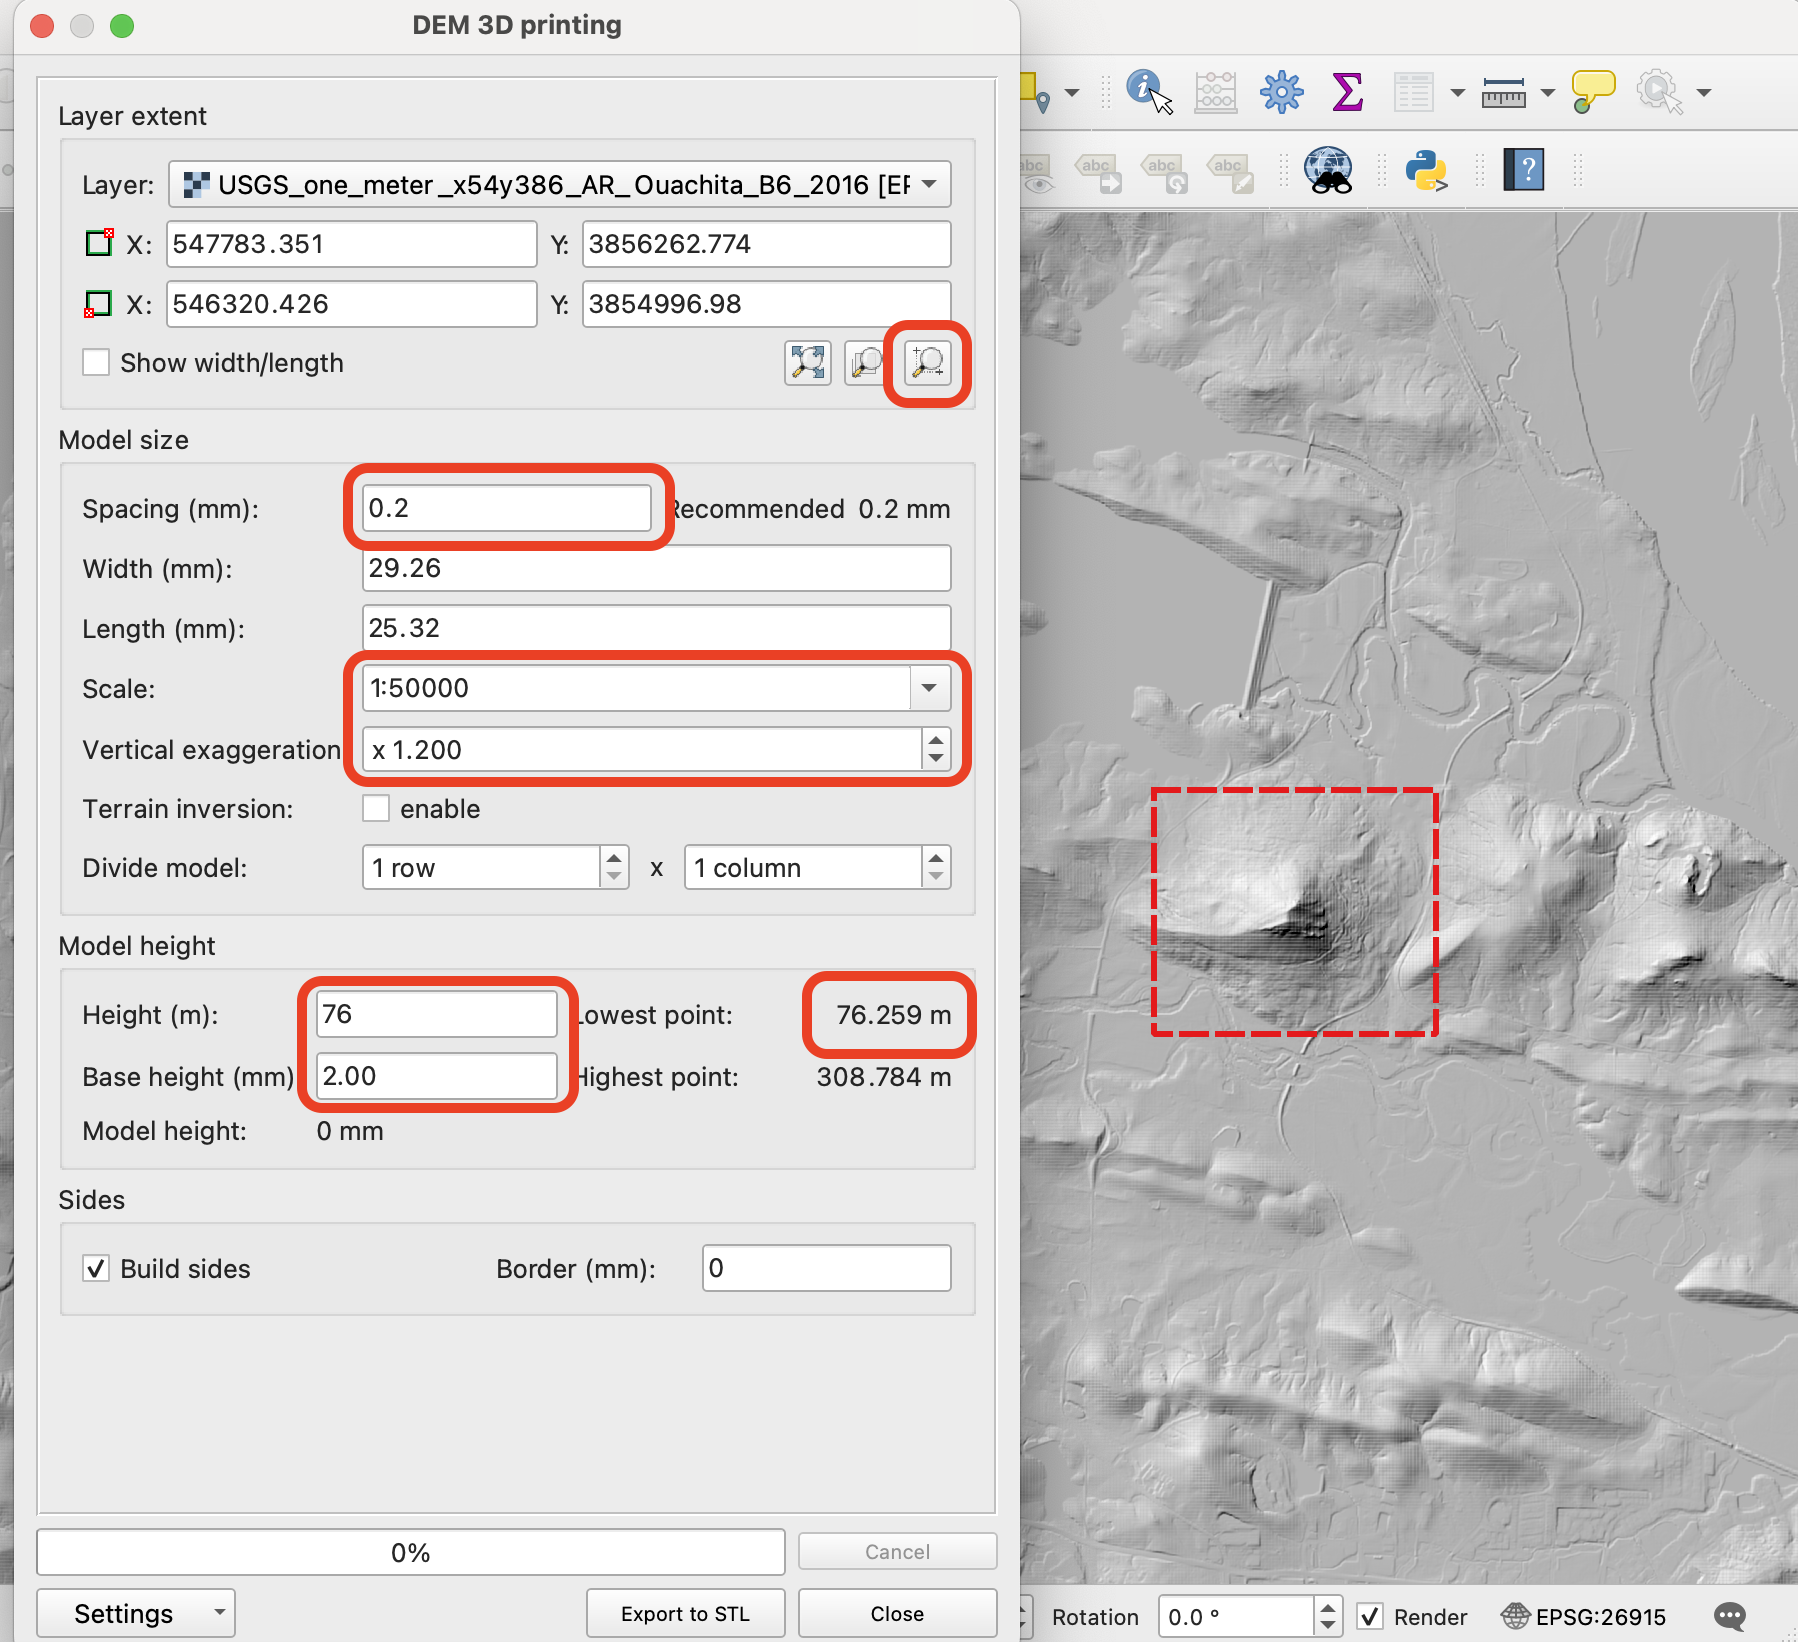
Now all that’s left is to install and use the DEMto3D tool. Huge thanks to Javier Venceslá for making this free tool available. To use, we simple go to Plugins->Manage and Install Plugins and then scroll down to the DEMto3D tool and check the box. Now we go to Raster->DEMto3D->Dem 3D Printing which opens a new dialogue window. Using the draw extent tool makes it easy to draw a rectangle around the mountain, and most of the other info is straightforward to fill in. I set the Height to be just below the Lowest Point so that the entire model would be represented with nothing being cut off at the bottom. now all we has to do is click Export and we have our .slt file!

Displaying 3D Models Online
I followed Slim Nate’s guide on how to embed a 3D viewer on a webpage, which is how the model is displayed on this page. The viewstl is the plugin used.
If you’d like a copy of the .tif file please reach out

Comments